
|
This Reaper costume from Overwatch is all made out of scratch using pure EVA Foams with no templates at all. The long coat is a black synthetic vinyl fabric lined with a typical Geena silk which I painstakingly sewn together using a cheap mini-portable sewing machine. The mask was sculpted out of 8mm thick EVA Foams and later on coated with clear resin, intentionally not sanded to give it that rough skull looking texture. The costume was made by Celtic Props, and the photos you see here are all taken by Stan de la Cruz. 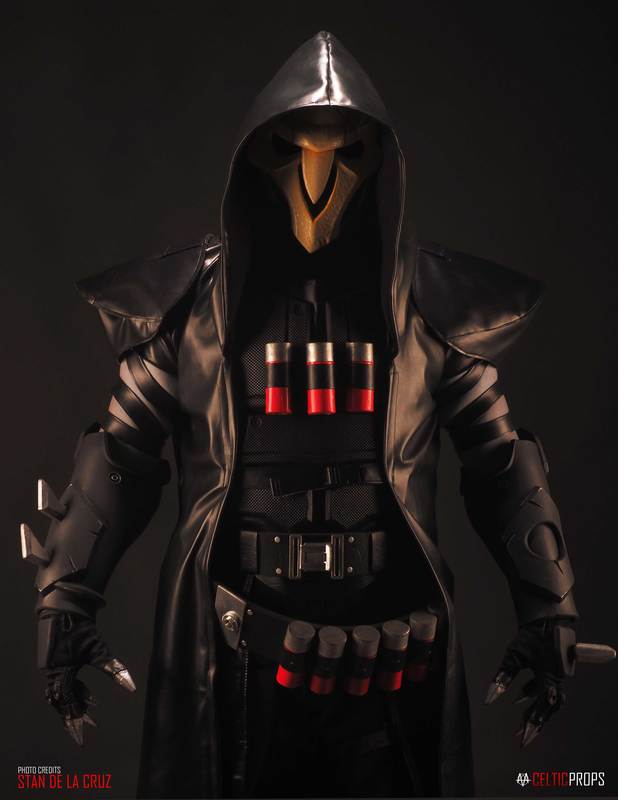 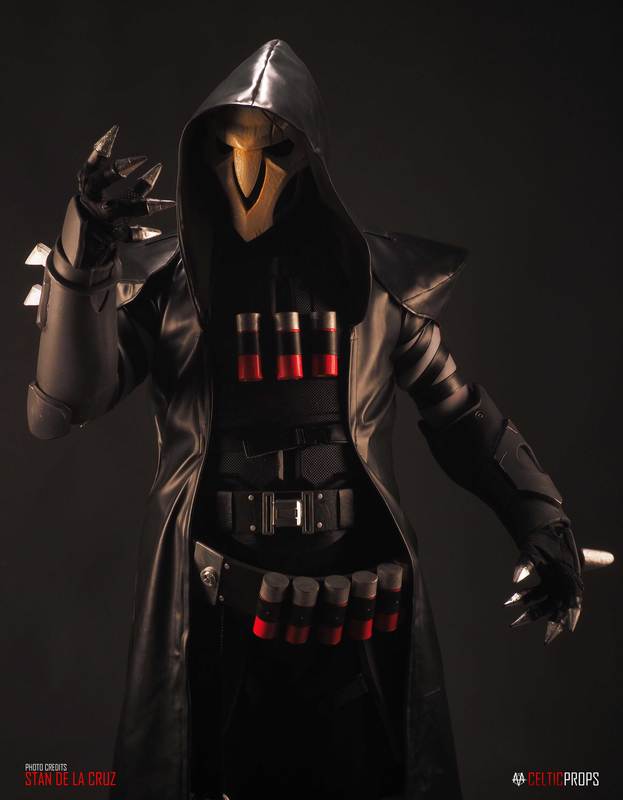 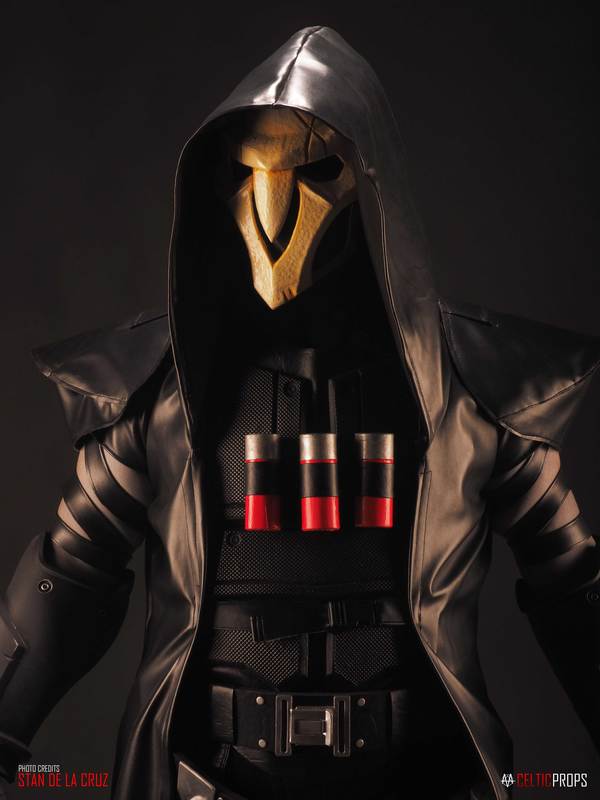 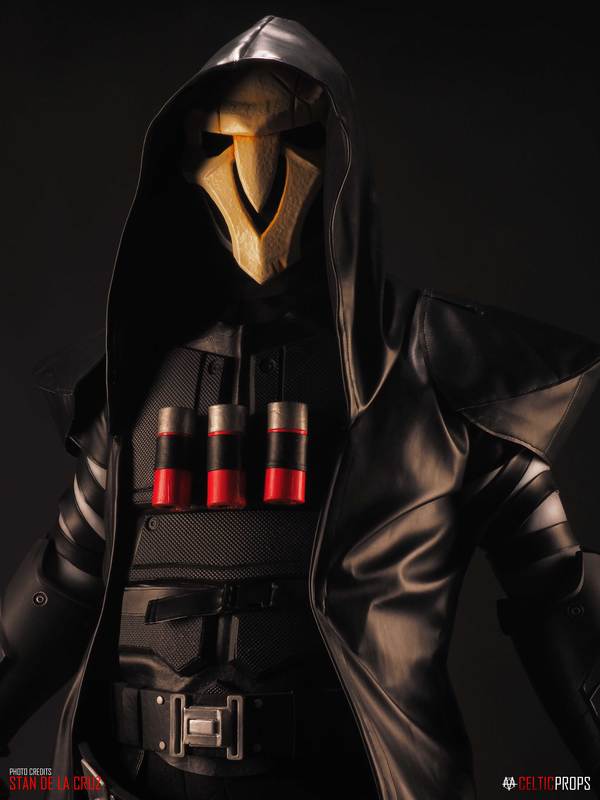  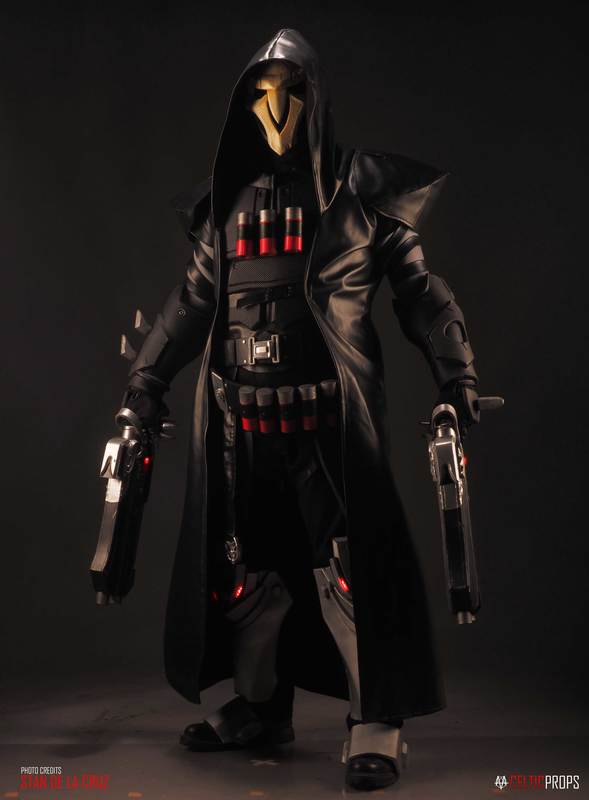   #PropBuildThrowback2016 2016 has been an awesome and overwhelming year for me and since it is almost over within a few hours and we'll all be welcoming 2017, I think it's appropriate to post this blog of the costume / props and projects that I've made throughout the year. Please note that this is going to be a long read so, I still hope you could get to the bottom of it haha! 1. Knightmare Batman
2. Legolas' Elven Daggers and Captain America's Shield
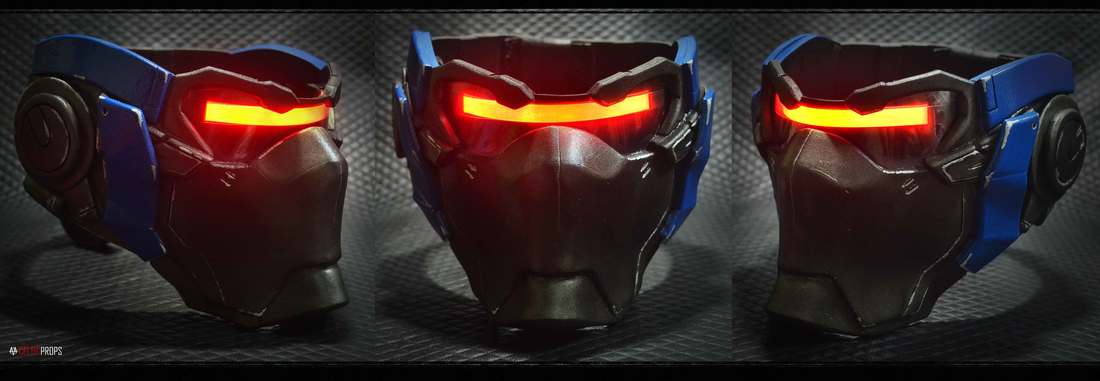
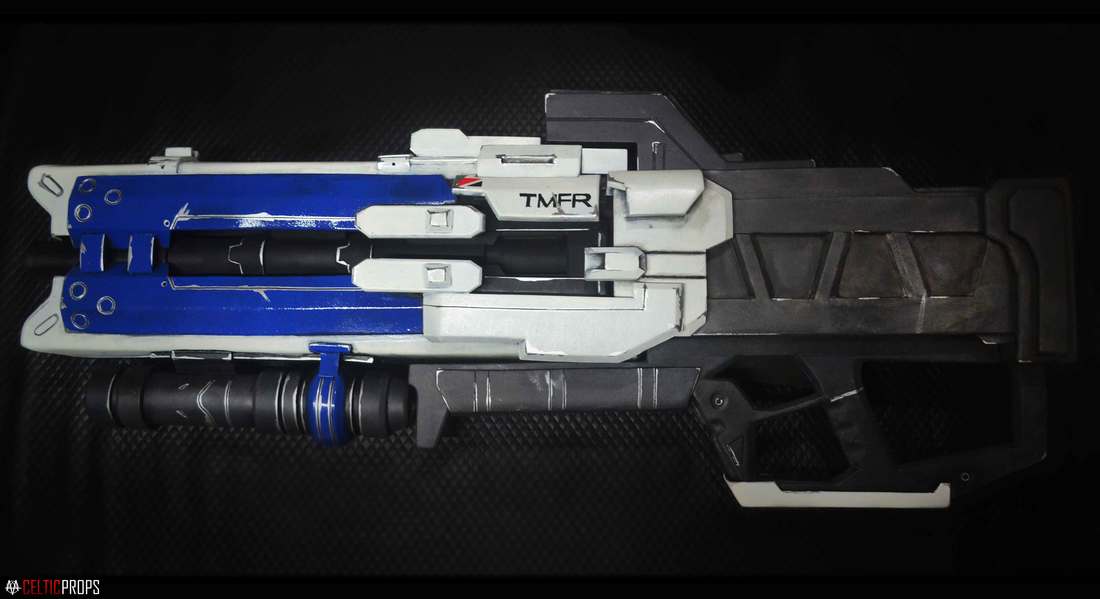
3. StarlordA friend asked me to make Starlord's helmet (plus his accessories) for his cosplay. It's not 100% accurate but I'm happy with how it turned out to mention that I've built it for 3 hours only because, I'm also busy working on my own costume during that time. 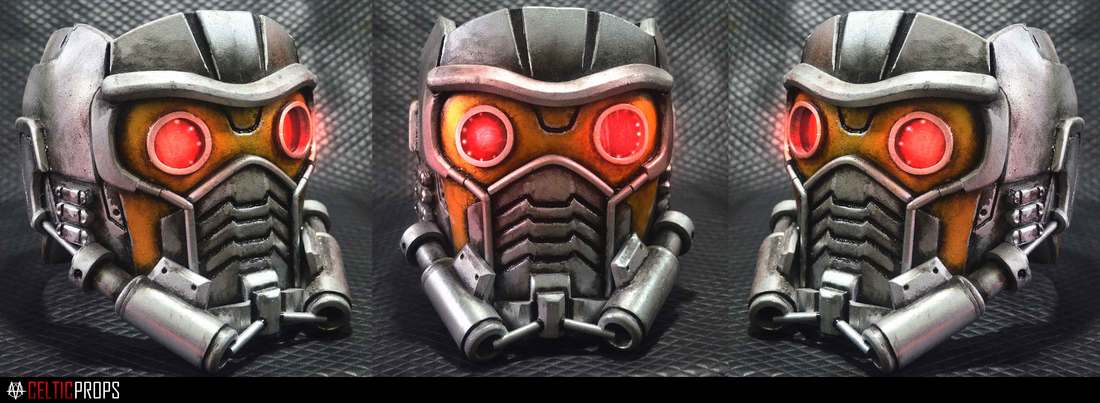 4. Soldier 76's Helmet and RifleNot to brag, but probably the first ever best Soldier 76 mask there is. In fact, it even got a ton of views, likes, comments and shares that I've ever experienced in my whole costume and prop building life. It was also featured in The Replica Prop Forum and even got stolen by some Chinese dude from AliExpress.com (LOL)
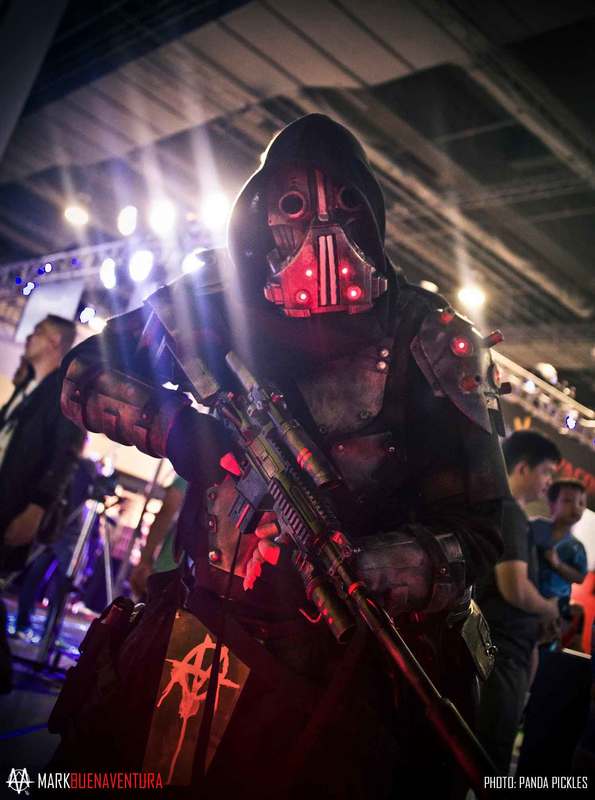
5. Wasteland AssassinAside from making costumes and props, I'm also a freelance concept artist / character designer so, back in August, I've decided to cosplay one of my characters which was the Wasteland Assassin.
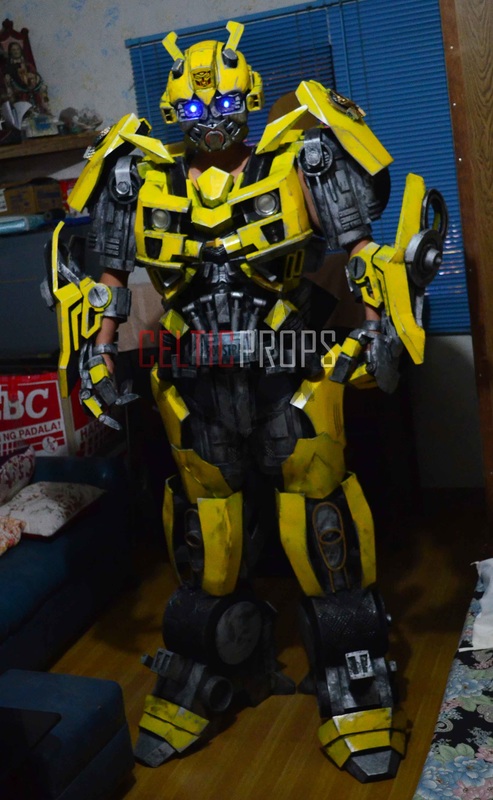
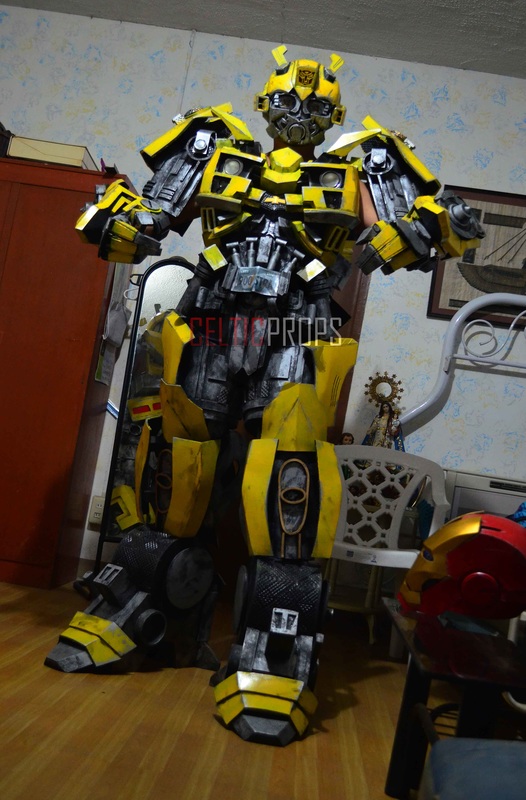
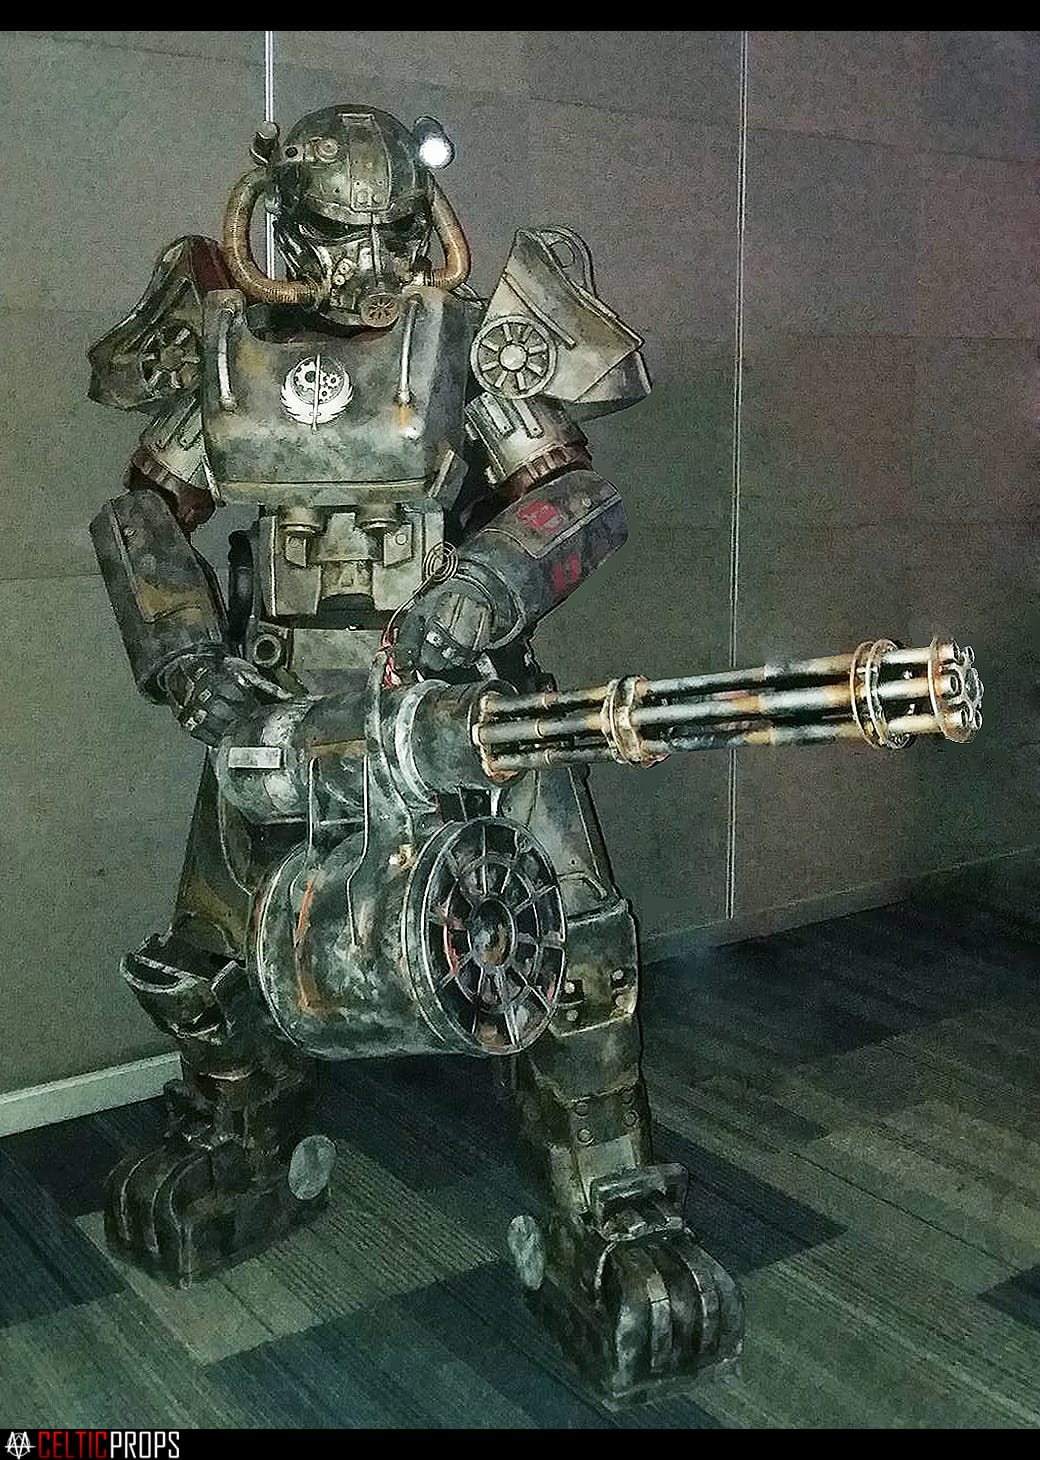
6. Ezra Miller: Flash SuitFew weeks after the release of the official Justice League movie, one of my old cosplay friend asked me to make him a full Ezra Miller Flash suit from the upcoming Justice League movie. Probably not the best one out there, but definitely the first back then. 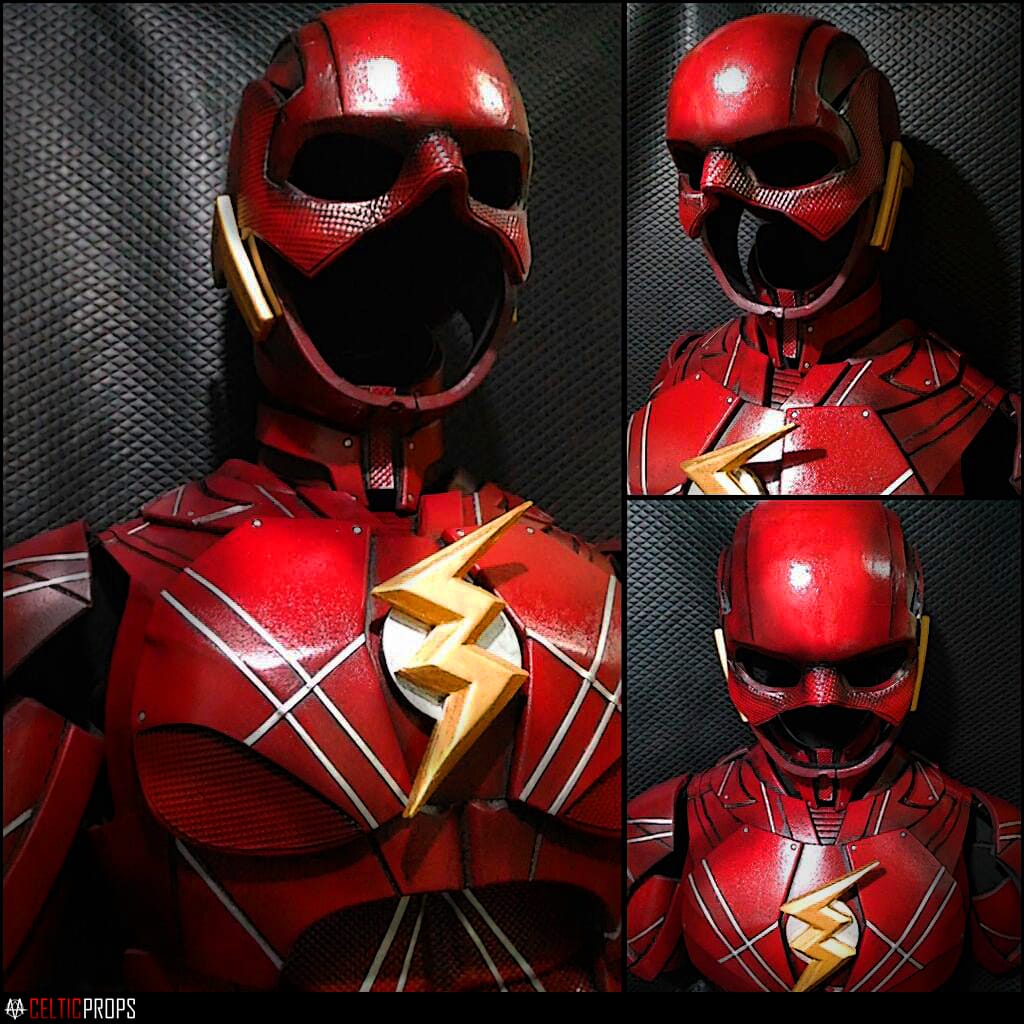 7. T60 Brotherhood of Steel: Power ArmorBeen busy with costume and prop commissions and didn't had the chance to make something for myself for the past few years so, I've decided that I should make something BIG for myself this year and so I did. Hence, the T60 Power Armor was built. It won two large cosplay event in the country and got the right attention for it.
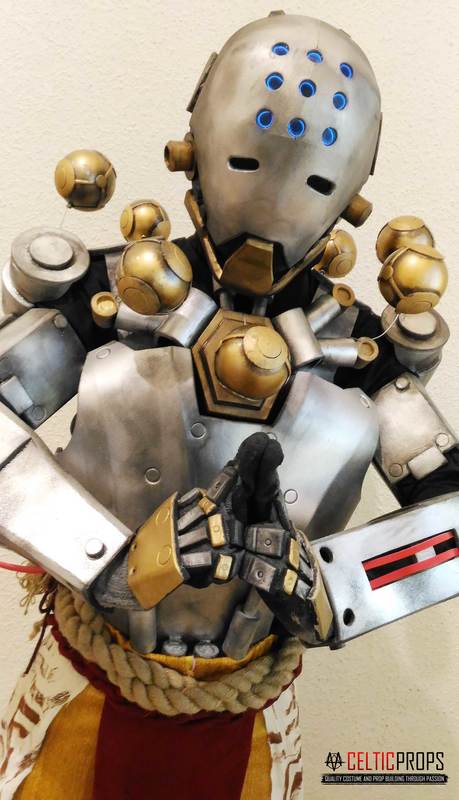
8. Reaper and ZenyattaI've been a big nerd for hooded, dark type characters and ever since the first Overwatch trailer came out, I've been already eye-ing Reaper. I just didn't wanted to be a wagon rider who just cosplays a certain character without even knowing them or in this case, playing as Reaper. Recently, a friend helped me on getting the game and so I've finally decided to do a Reaper costume. Prior to my Reaper costume, a friend also asked me to make him a full Zenyatta costume. Decided to document the 1 week build and uploaded the whole playlist on my Youtube channel :D
Well, that sums up my 2016 Costume and Prop building experience!
It has been a wonderful and productive year indeed. I'm hoping I could get my hands on more awesome projects to come! Let me know about yours! Post it on the comments below or use the hashtag #PropBuilding2016Throwback Happy building and more costumes / props to come! :D Finally finished this 1 week suit build Zenyatta costume from Overwatch! Everything is free-hand crafted out of scratch using 5mm - 7mm thick EVA Foams. You can watch the whole build series on my Youtube channel if you'd like :D Don't forget to subscribe! Cheers!
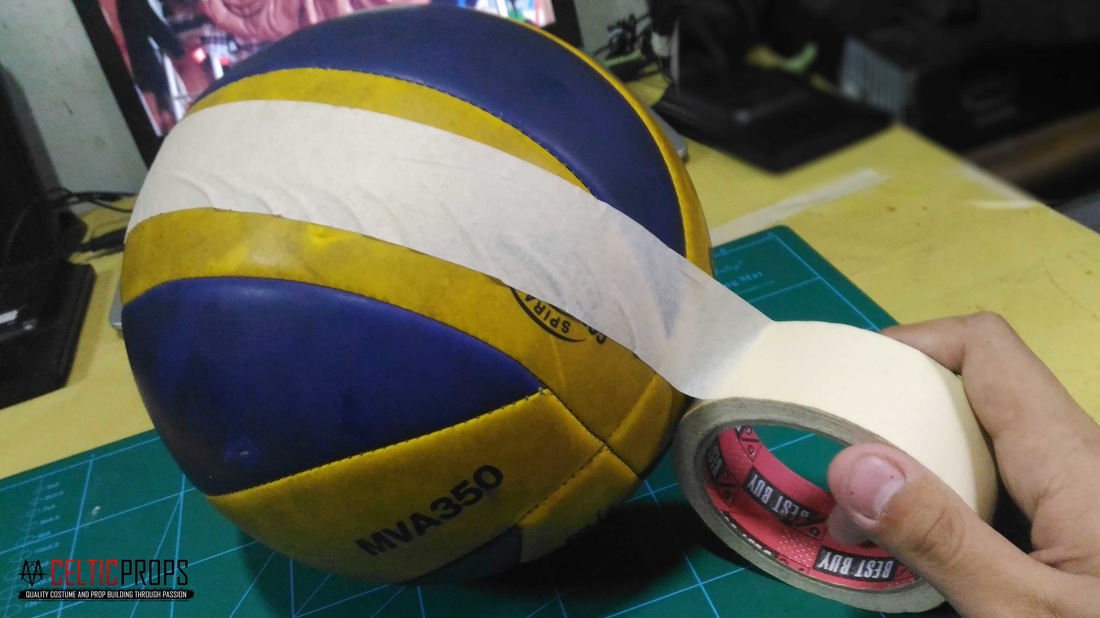
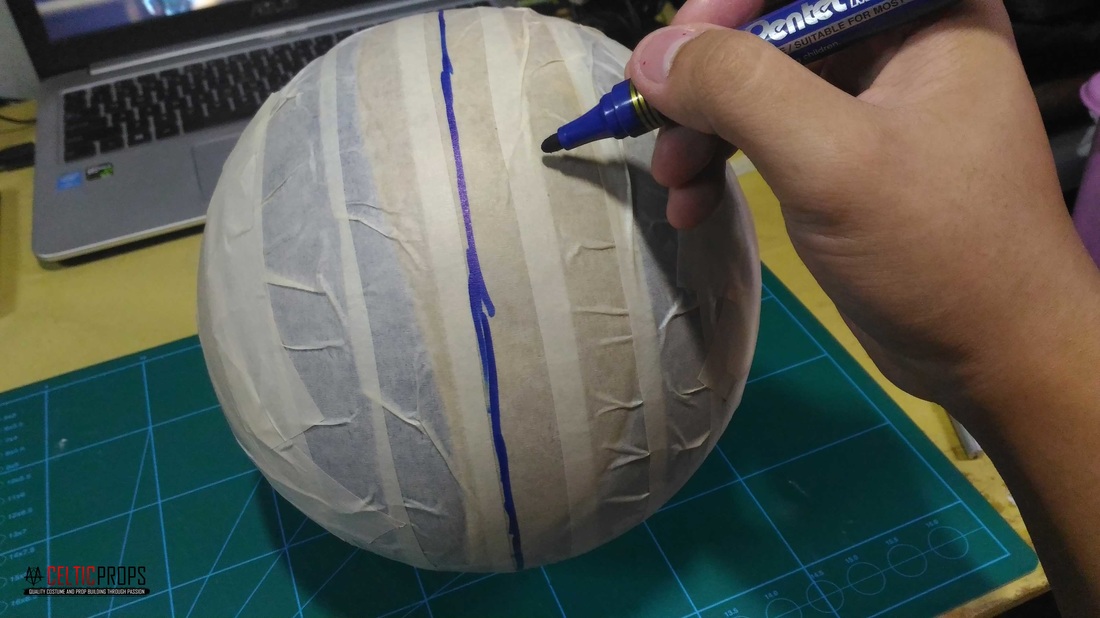
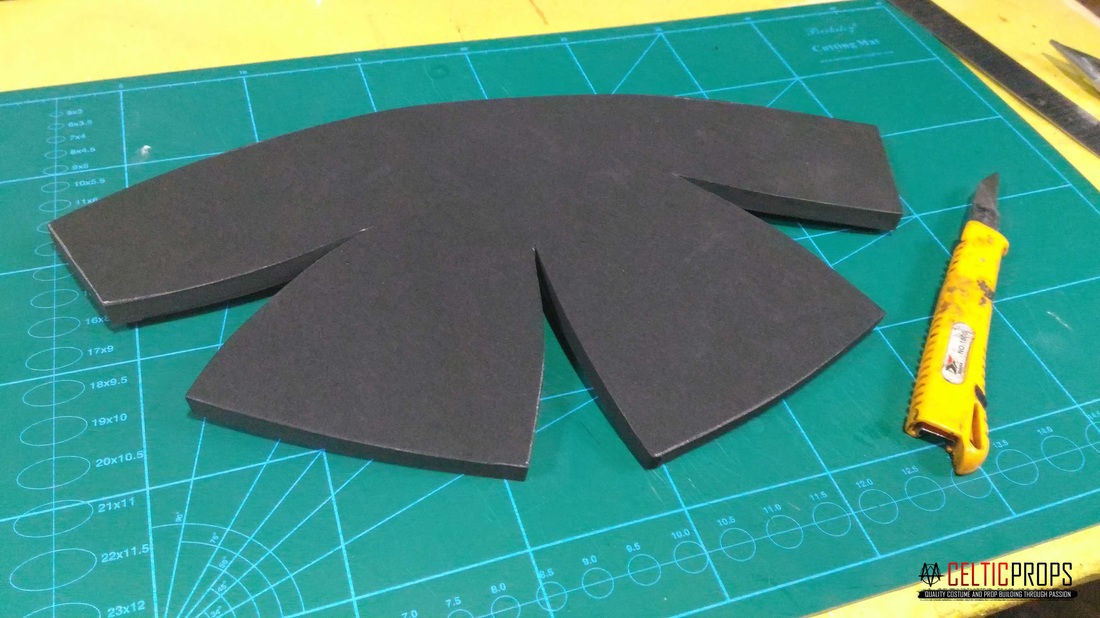
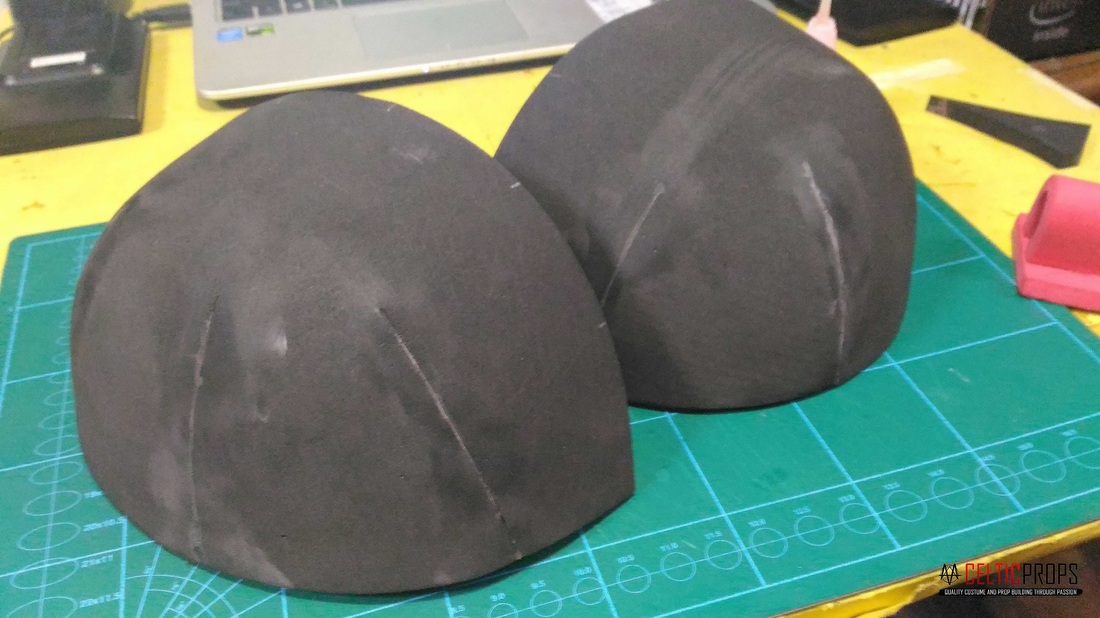
 The third and last video just for the main Zenyatta armor is up! Only got a week to finish this suit in time for Christmas Toys and Collectibles Convention 2016! Still have to paint the suit tomorrow and make the Orbs! Weew~ still lot to do though. All the armor pieces are made out of scratch using 5 millimeter thick EVA Foams. The feet were modified cheap thin rubber shoes that I bought for 2 dollars on a local shoe supplier. Please do SUBSCRIBE to my channel to follow along the build! Cheers! Hey prop makers! In this simple tutorial, I will be sharing one of my techniques in making a pattern for a dome shaped cap or a helmet base for my cosplays. I hope you'll find it helpful because, I do. Haha! I've been using this technique for almost all of my rounded type helmets and also, some other parts that requires a dome shaped pattern ie; some shoulder bells, knee caps, etc. Without further ado, let's start building! Materials:
STEP 1: Start covering up the half of the ball. Yes, only the half and NOT the entire ball.
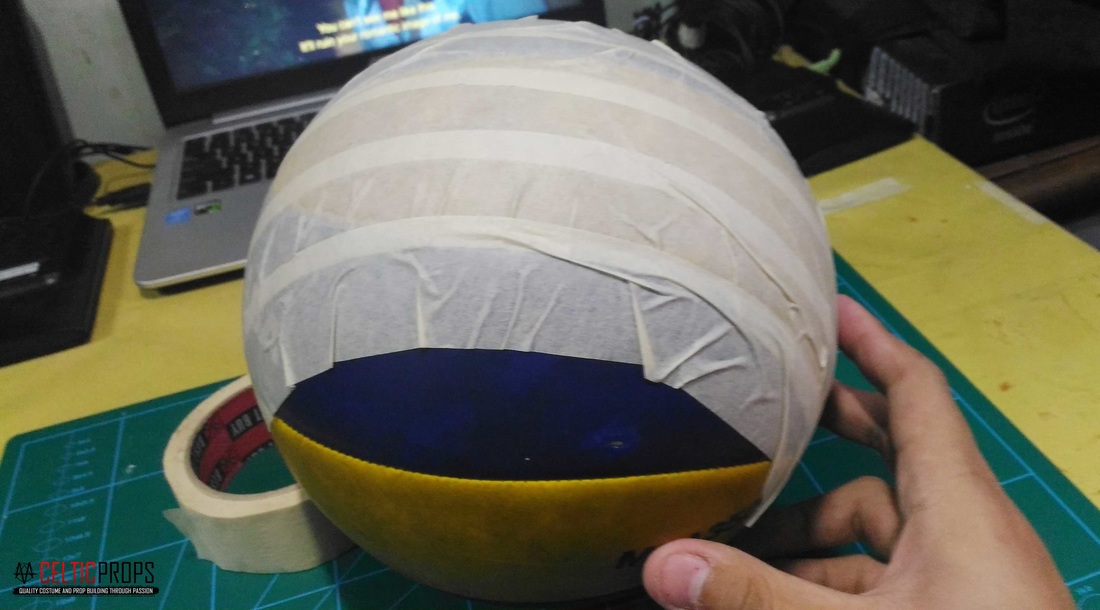
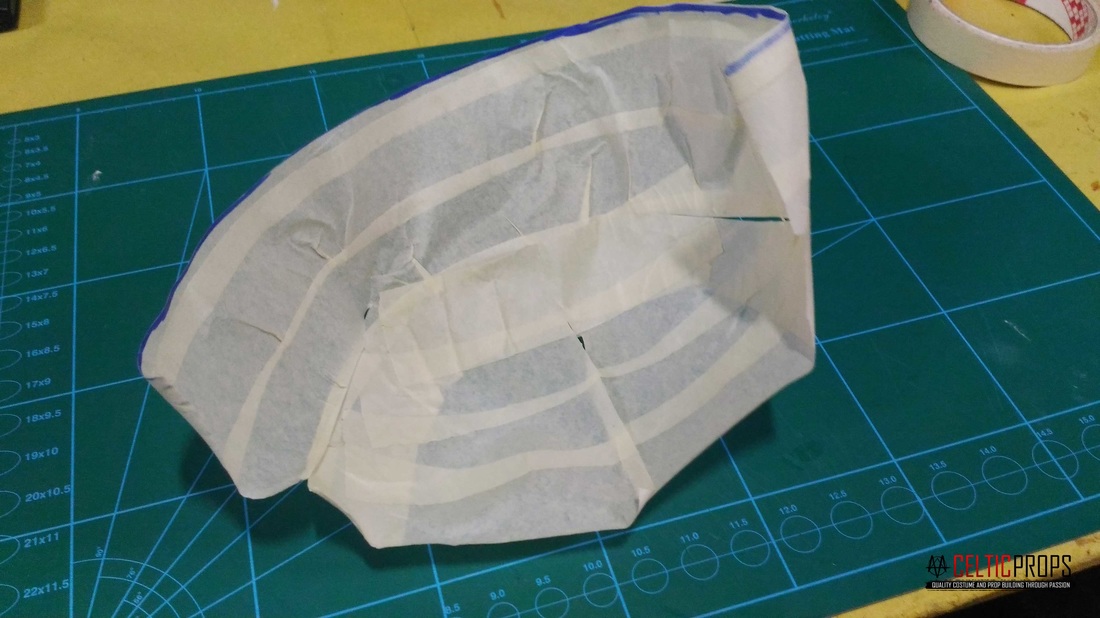
You should have something like this. AND YOU'RE DONE! 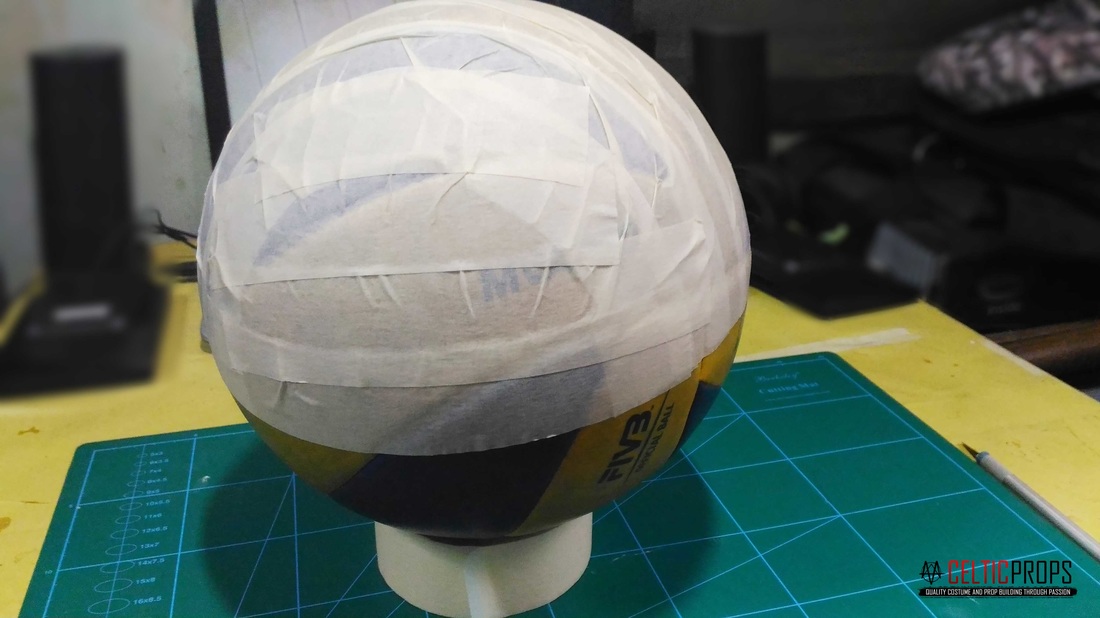 Just kidding... STEP 2: Go and put a line on the middle of the "bowl" that you've made using masking tape and cut along the lines. Don't go too deep (that's what she said lol) because you might cut the ball and pop it. If you'd look closely, I've already cut mine hah!
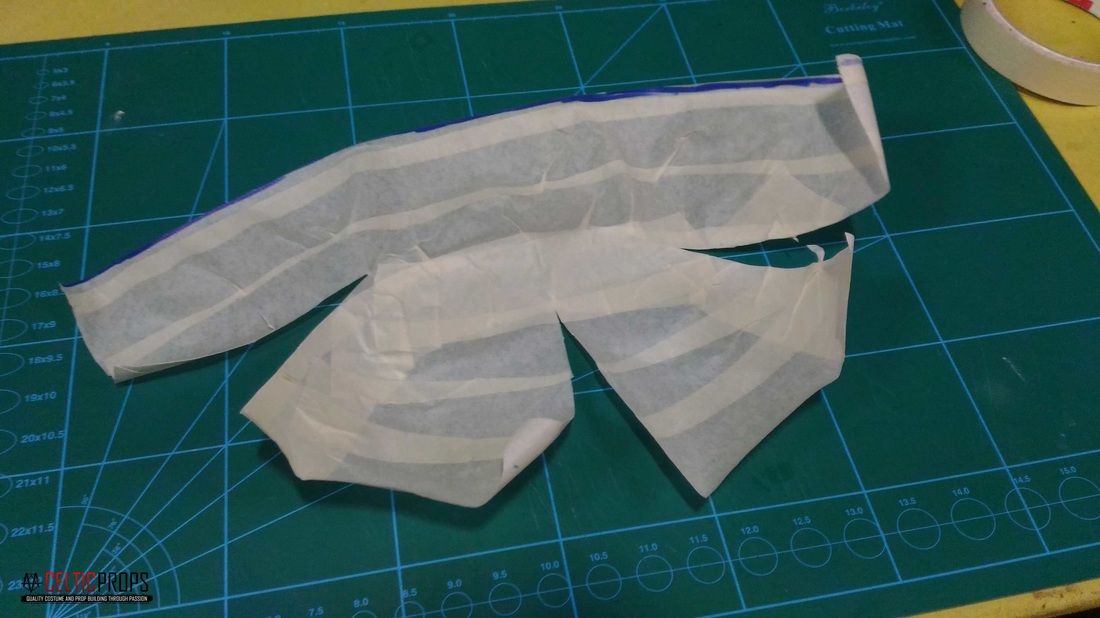
You can actually not cut the middle and split the two pieces together but, I just did this because I find it easier to transfer it on paper (which you could see on the next step) STEP 3: Peel off the tape from the ball and you'll end up having a curved ellipse / eye shape. After you did the prior instruction, try to flatten out the masking tape pattern by putting cut lines like what I did on the photos below.
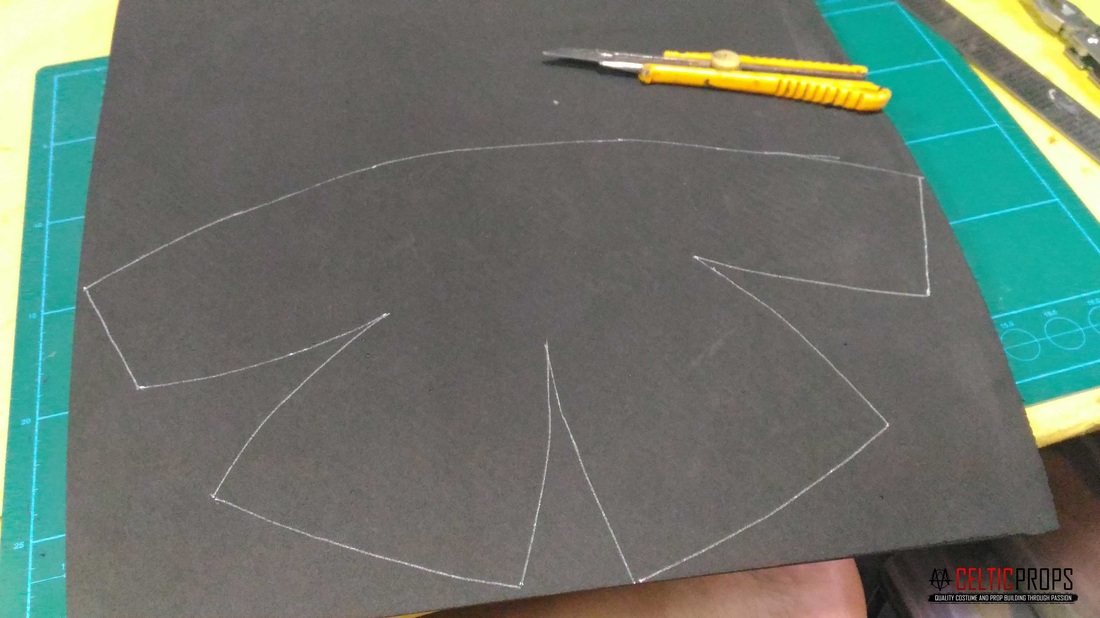
As you flatten out the template, get any piece of paper and stick it there. And because the template is made out of masking tapes, it would easily stick to the paper. MAGICAL isn't it? haha! VOILA! You're done with your pattern! 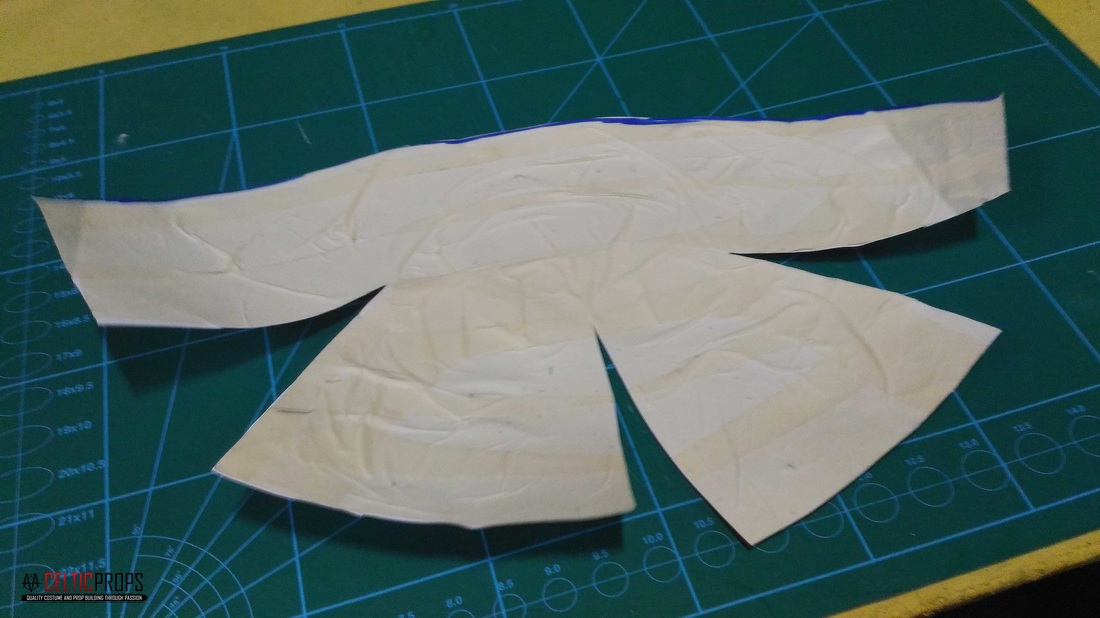 STEP 4: All you have to do now is trace out the pattern on your EVA Foam or whatever material you're using for your build and cut it out using your sharp, trusty knives! Be careful though. Note: Make sure that you have a sharp edged knife that could cut along your material easily to have that crisp, neat cut!
STEP 5: Make an exact copy using the pattern that you've made a while ago. Remember?? The pattern that you've made? The thing with the masking tape and all sorts of awesome thingy?? Good.  STEP 6: After you're done making the two pieces, you can now proceed on preppin' up your preferred glue and start gluing each of the edges until you come up with something like these.
STEP 7: All you need to do now is glue the two pieces together and VOILA! You have now unlocked the skill of making your own dome shaped base helmet! 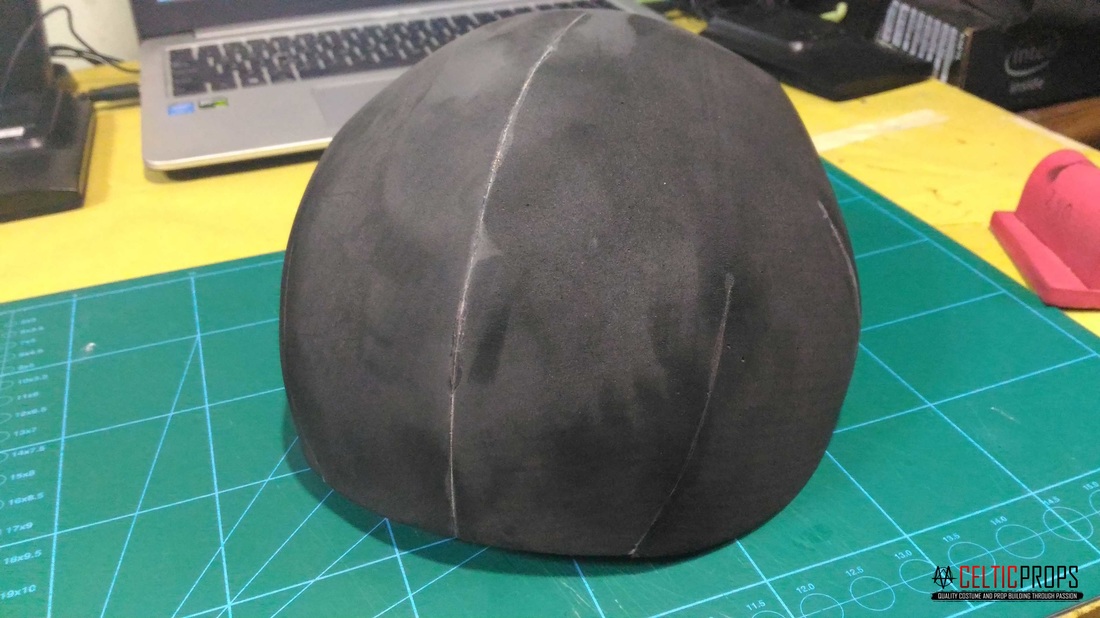 Here's my T-60 Power Armor Helmet that I recently did using the same pattern for the head.   Now, what are you waiting for? Go forth and build something! Good luck! :D  The second part of the Zenyatta costume speed build from Overwatch! In this video, I will be covering the process of the chest piece / upper torso via free-hand build out of scratch using 5 millimeter thick EVA Foams. Still a lot of missing details but hey, it's getting there! Will be making the lower torso then the arms in the upcoming episodes so stay tuned and SUBSCRIBE to follow me along as I complete this 1 week full suit build! :D What's up fellow prop makers and Overwatch fans! I just started out a small costume build series on my Youtube channel. Follow along as I complete this build within 2 weeks! Yup, you read that right! There's an upcoming Christmas cosplay convention here in our country and I'd be needing to finish this for that said event. It's not gonna be for me though. It's a commission piece for a friend who's fit enough to cosplay this humble Omnic. Be sure to SUBSCRIBE to my channel to get notified on updates as I build it DAILY. Have a nice day! :D 

Selling this guy for $850
The client who asked this commission from me didn't showed up anymore. It's been two years and I still haven't got anything from him (what a douche, I know) not a single word nor any update. So, this is currently taking up a lot of space in my room and decided to let go of it. Specifications: -LED light up eyes -Chest headlamps -Plexiglass car window doors -All made out of EVA Foams -More or less 8 inches lifts -Fits for medium - large size body built -Fits for 5'6 - 5'11 height (size reference for the costume to look proportion) *Shipping is NOT yet included* 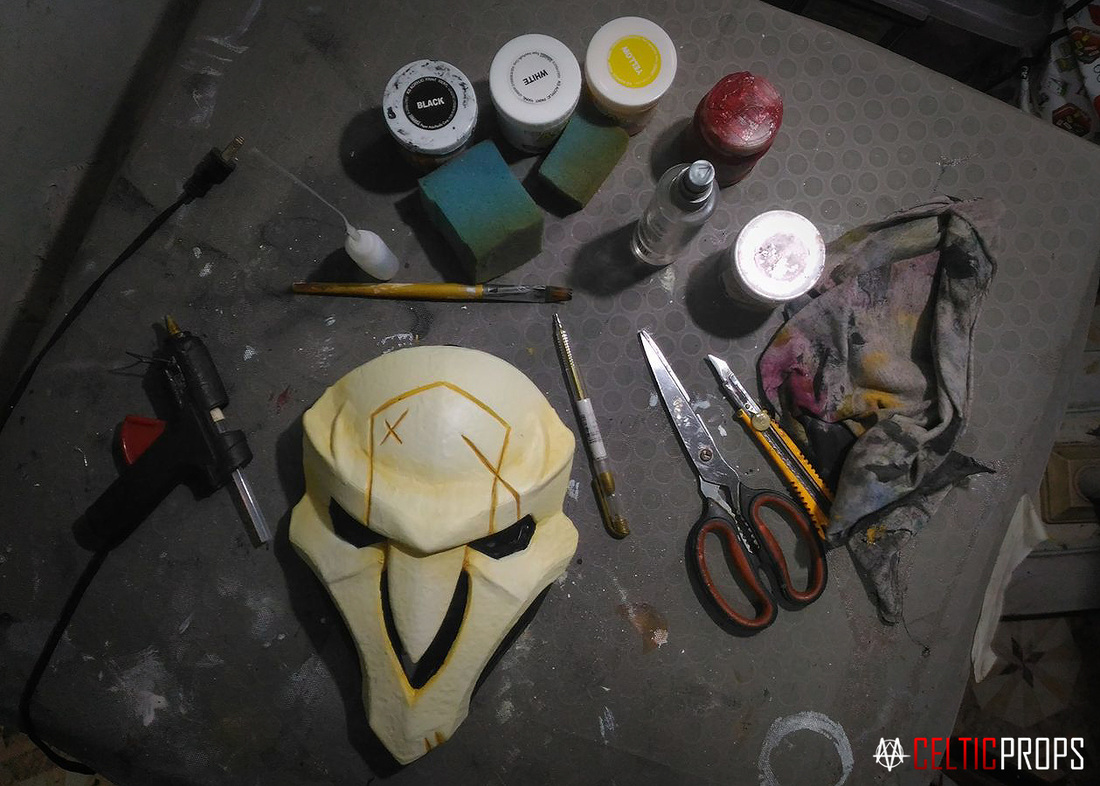 This is what my usual work table looks like... messy, paints all over, small... As you people see, I'm not that kind of a big-time Hollywood costume and prop maker. I've been making costumes and props since 2008 and since then, I only settled for a 26 x 26 inch study table that I consider as a "workbench table" because that is the only thing that could fit in my room.
This is not a dramatic, pity-seeking post, ladies and gentlemen. I would just like to show you and say that you do not actually have to be that wealthy and fortunate enough to produce your dream cosplay/s. You do not have to spend so much money for a ridiculously expensive cosplay materials or buy one online. But hey, don't get me wrong. If you have the capability to do so, then go. Do it. Nobody's stopping you. It's your money.
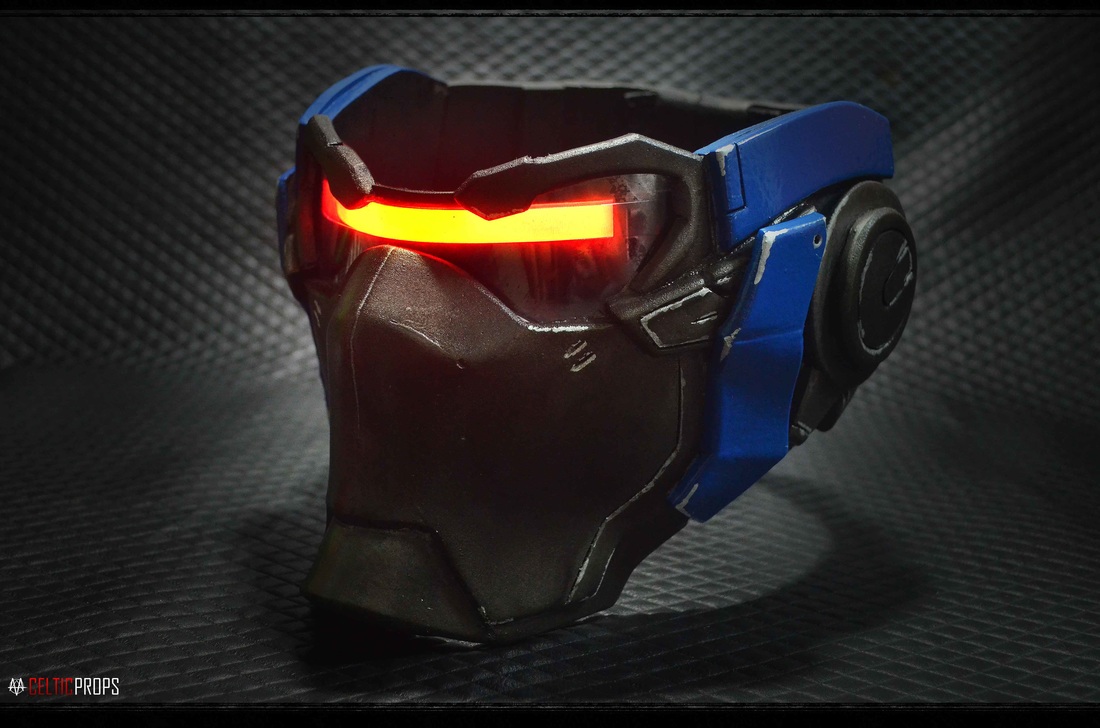
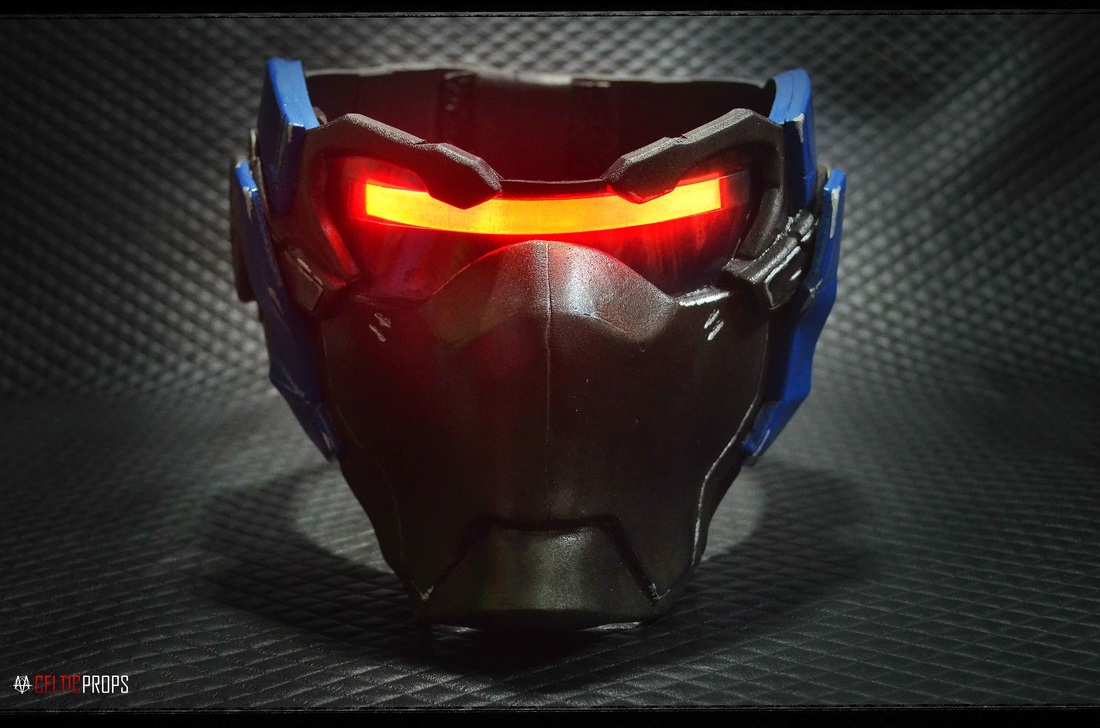
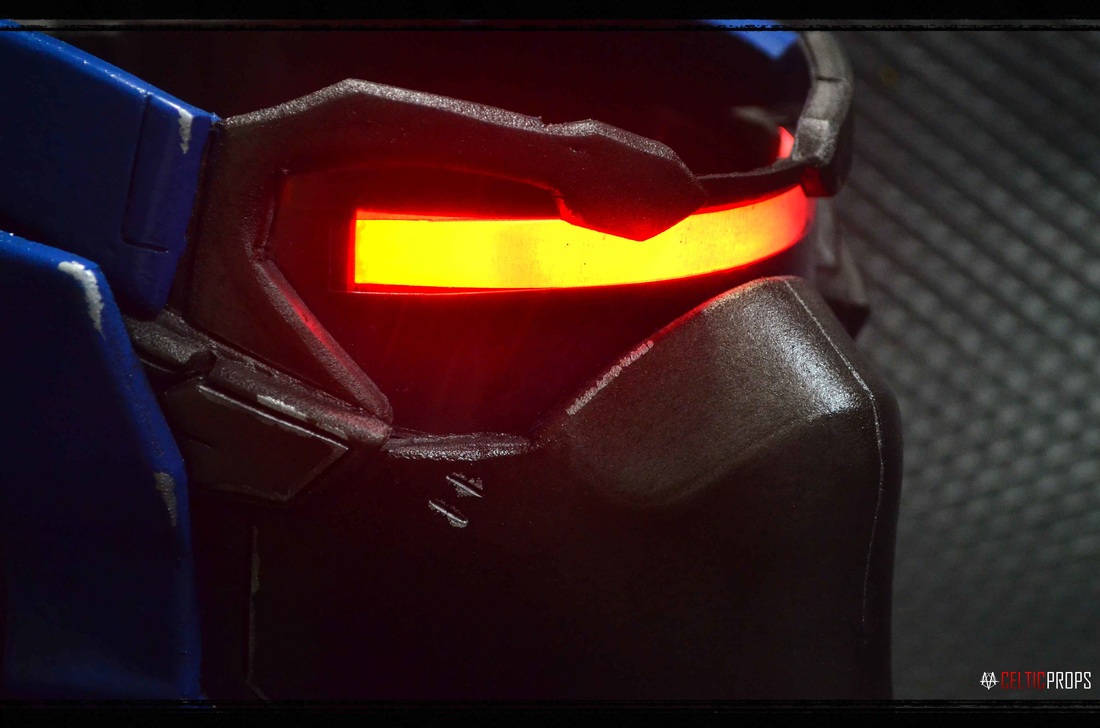
My only point here is that, there are so many stuff lying around you that is waiting to be used and it's just a matter of perseverance, dedication and commitment on how you could manipulate these "cheap" things for you to pull-off you epic dream cosplay build. Also, remember to have fun and enjoy what you're doing because this is your key to awesomeness! Happy building! :D #CelticProps #Cosplay #CostumeMaking #PropMaking 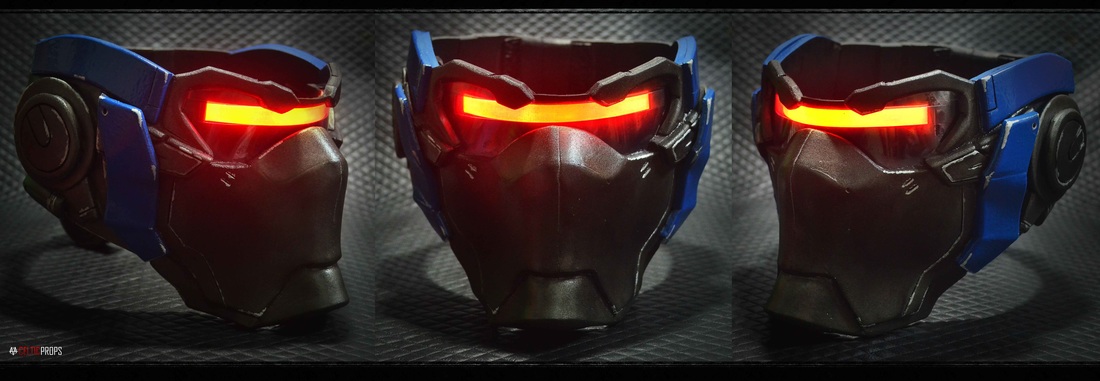 Finally finished this piece and I'm so happy how it turned out. It was my first time using those kinds of LED luminescent tape and wow, the output was totally mind blowing! This project was actually an achievement unlocked for me because I am actually itching my hands to craft something from the game OVERWATCH but due to the fact that I haven't even played it yet and scared to be called as a "bandwagon", I didn't pursued in making a cosplay from the game for myself. Til one day when a client asked me to make a Soldier 76 for him, I excitedly answered "YES" because finally, I can make something from the game even if it's not for my personal use. Anyway, here it is. The Soldier 76 Mask that I've made. It was truly a fun and fulfilling build ever. Will be working on the rifle and other accessories by this week and hopefully finish everything before our family vacation by the first month of August. 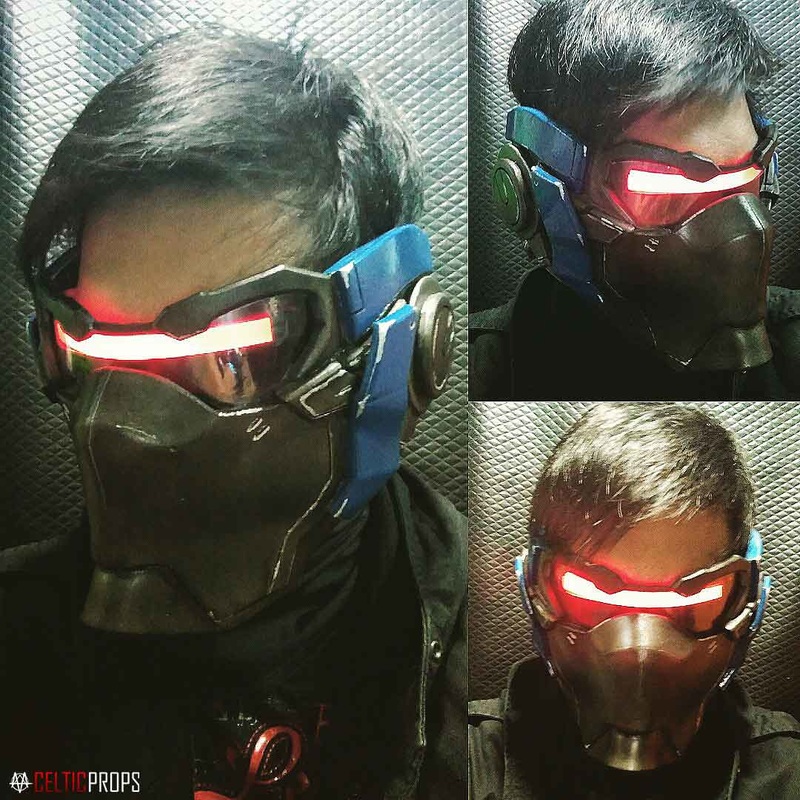 |

NEWSLETTERThis page contains news, updates, work in progress projects and blog entries. Just keep scrolling down because this is one heck of a long page haha!
Archives |


 RSS Feed
